
 |
 |
 |
 |
 |
This page will cover the installation of a CD-Changer, the brand name isn�t important. It was an RF model that operates on 2 different frequencies. First thing I had to do was locate a suitable location. I decided that it would fit just fine under the driver�s seat.
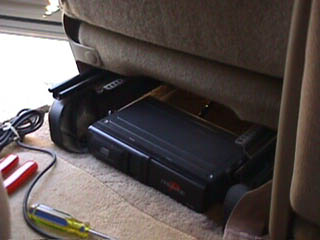
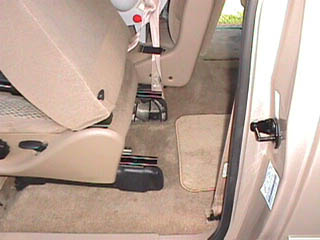
As you can see, the fit was just about perfect. This picture is taken with the seat all the way forward. With the seat in it�s normal position you can�t even tell the changer is installed without being in the back of the truck.
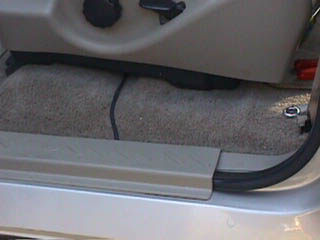
I ran the wire from the changer under the seat and to the entranceway trim. I would have ran it under the carpet but I really didn�t feel like removing the seat when it really wasn�t necessary. The wire in this location will never get in the way and serves my purpose.
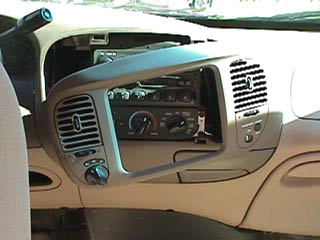
Next comes the tricky/scary parts. I wondered how to get the cover off the radio so I posted to the mailing lists and was given the answer �Just pry it off. It will snap right off.� Well, that�s what I was afraid of, it SNAPPING right off. Well, I did as instructed and sure enough, it came right off. The Electronic 4WD swich was still connected as was the airbag switch so I took a small wrench, don�t remember the size, and unmounted the controls and removed them from the cover so that I could set it safely to the side.
The next trick was to get the radio out. Once again, I asked the mailing lists and they said �You need a special tool.� and �You need a coat hanger...�. Well, I took a wire coat hanger and cut it into four different pieces, a piece to slide into each of the four holes by the mounting tabs. The idea is to release all the tabs at the same time so that the radio slides right out. Well, it�s a lot harder than it sounds, but after some playing, I got it out. It slides right back in easily, by the way.
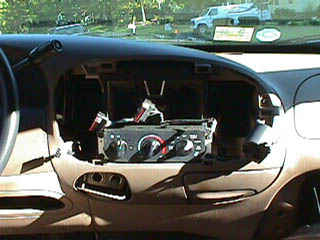
I mounted the RF box up under the dash on the driver�s side and fished up the antenna wire to the radio. Basically, the antenna wire from the box goes into the radio and the antenna wire from the antenna goes into the box.
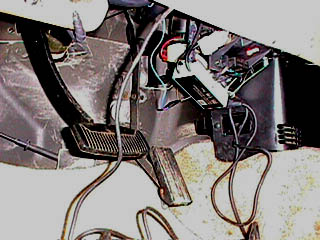
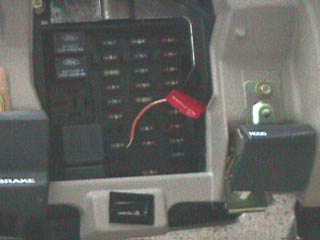
The next thing that I had to do is figure out where to get a 12V constant, a 12V accessory and a ground connection. I found the 12V constant in the glove box. I used the hot running to the light in the box. I
also used the ground connection in there. For the 12V accessory I used the slot that fuse 8 is in for the 12V constant. I didn�t have schems so I just used what I could were I could. Your mileage may vary. :-)
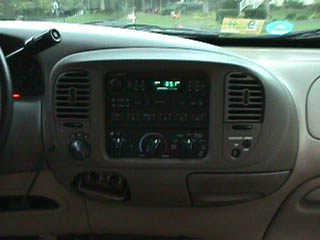
Installation is complete, the radio is back in, cover on and it works. The only tell tale sign is the remote (not pictured) and the wire running from under the radio cover to the small storage compartment below and to the right of the steering wheel.
Please contact me with questions or comments.
© Copyright 1998, Edison Pettit, All rights reserved.